Galerie
Slide shows
| Differenziertes Krafttraining | |
| Blum: Kinesiologische Analyse | |
| Unterkiefer | |
| Ren mobilis (Die Wanderniere) |
Schriftliches

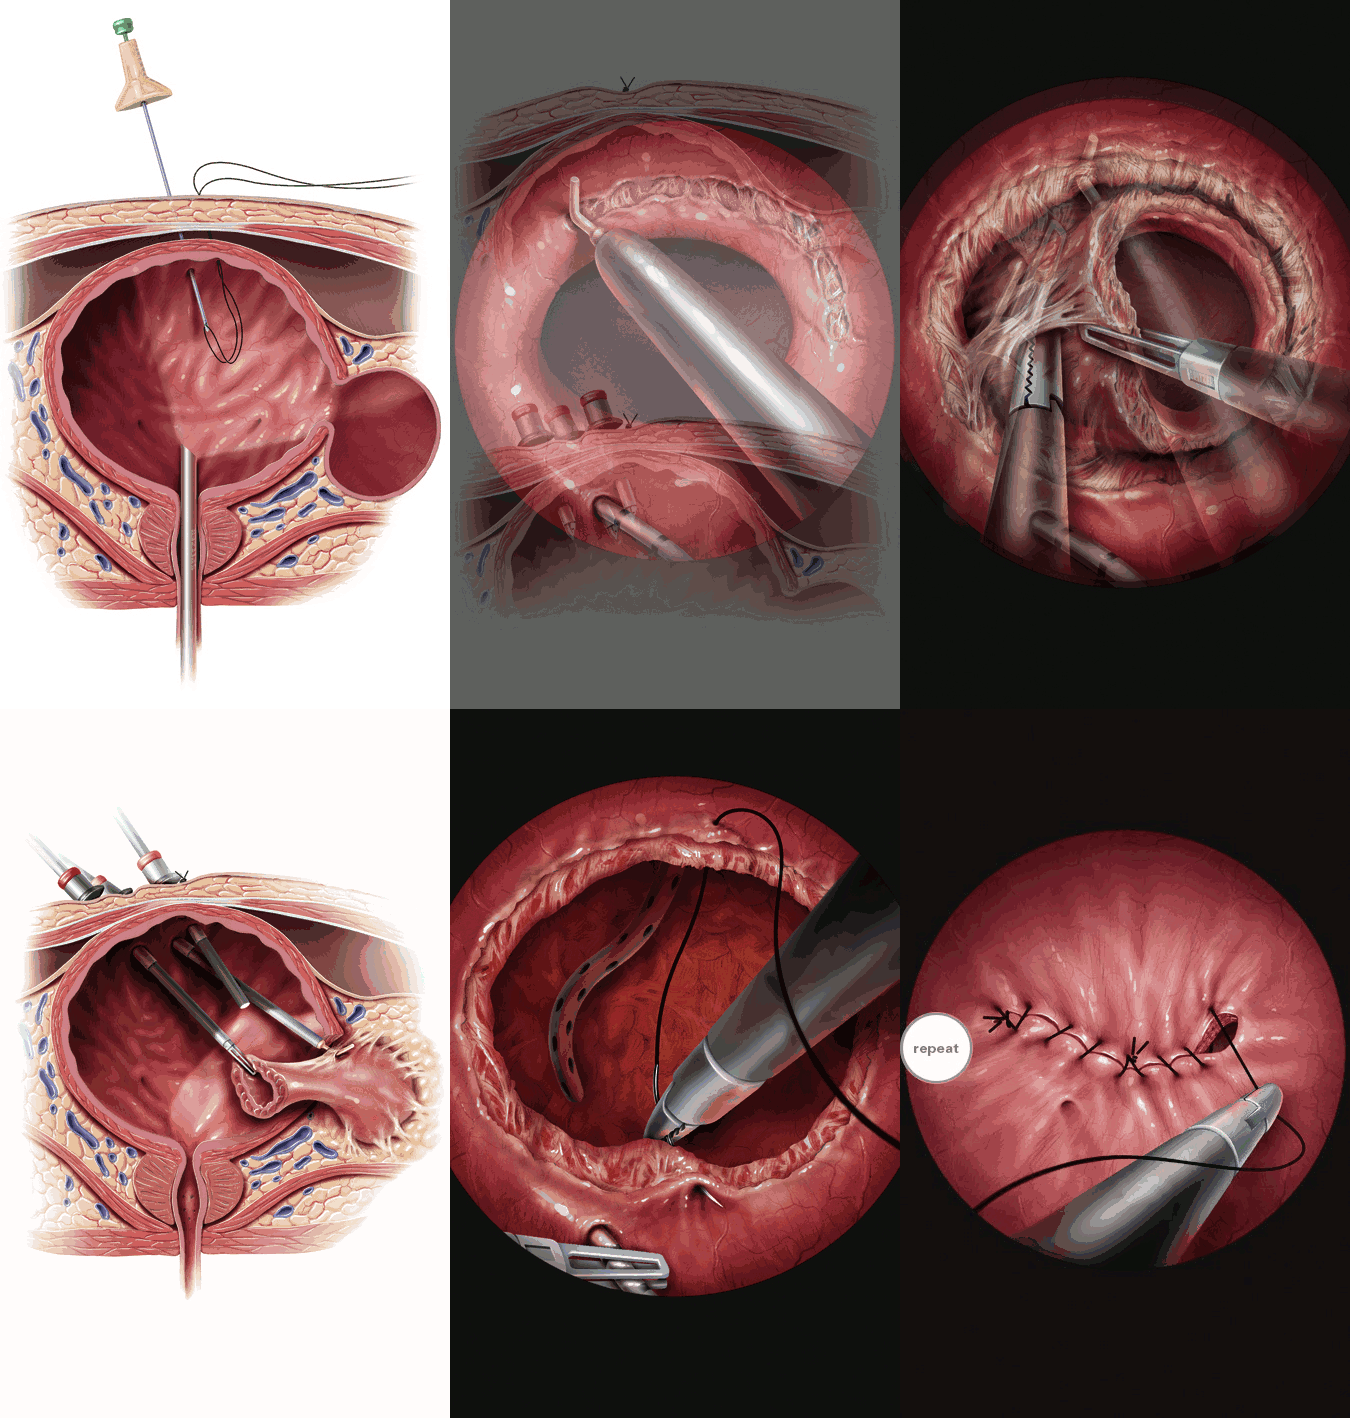
| Title | Laparoscopic transvesical diverticulectomy |
| Technique | Pencil / Watercolour / Computer |
| Author | Vito & Alberto Pansadoro, Paolo Emiliozzi, Vincenco Pansadoro Foundation, Rome, Italy |
| Publication | British Journal of Urology International (BJUI) |
| Publisher | Blackwell-Wiley Publishing 2009 |
| close window | |
| Figure 1 | The bladder is fixed to the abdominal wall using a Surgipasser needle with polyglactin 0 suture |
| Figure 2 | After trocar positioning, the cystoscope is removed. A 5-mm 0° optic is used. |
| Figure 3 | The neck of the diverticulum is outlined with the monopolar cautery all around. |
| Figure 4 | The bladder mucosa is incised. All muscular fibres are carefully divided until the correct plane between the mucosal wall of the diverticulum and the perivesical fat is found. |
| Figure 5 | Once the the proper cleavage plane is found, the diverticulum can be easily detached using two graspers. |
| Fig. 6 + 7 | The intact mucosal lining of the diverticulum is brought inside the bladder. |
| Figure 8 | A 5-mm incision is made lateral to the midline and a long Kelly clamp is introduced into the residual cavity. A Redon drain is introduced into the bladder, grasped and extracted with the Kelly clamp. |
| Fig. 9 + 10 | The bladder defect is closed with a single-layer running suture. |
| close window | |